Run Windows 7 on Android
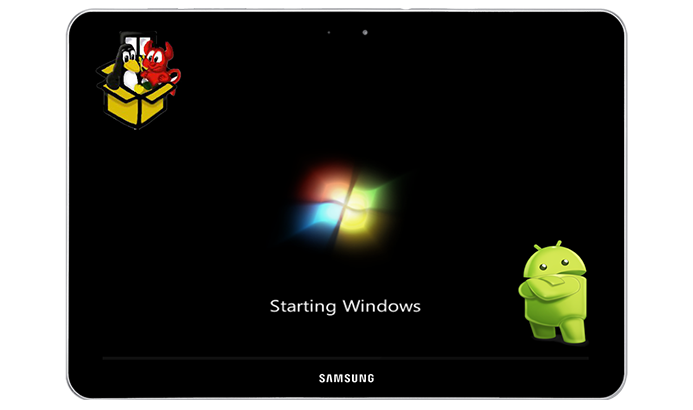
Believe it or not, you can actually run Windows 7 on Android, and you don’t even have to root your device. In this article, we’ll show you how and provide you links to everything you need to download and get Windows 7 up and running on your device.
Disclaimer
Before we proceed, you should know that this is only a proof of concept demonstration of what’s possible with emulation. Don’t expect Windows 7 to actually be usable after you install it on your Android device.
Depending on the performance of your smartphone or tablet, the boot time alone might be several hours long (yes, hours—not minutes), and you likely won’t be able to launch anything besides a few basic applications such as Notepad or Calculator. You also won’t be able to connect to the internet or fully take advantage of your device’s capabilities.
Demo video
Requirements:
- A capable Android device running Android 4.1 or higher (dual core CPU or better)
- The Bochs android app
- SDL.zip file download it here
- Windows 7 ISO file
- A lot of patience
Installation:
In order to get started download the SDL.zip file and extract the folder using an archiving tool such as 7zip or the built-in windows archive viewer. Once extracted move onto the next step to download Windows 7.
Next up, you need to download a Windows 7 disc image from Microsoft’s website. Simply scroll to the very bottom of the page, enter your Windows 7 product key, and click Verify to download a copy.
Alternatively you can create a Windows PE iso from your computer in the event you can’t remember your product key or the page above doesn’t work correctly.
Follow this guide if you wish to follow this route: How to create a Windows PE ISO file
This alternative method creates a portable Windows environment which doesn’t require installation and will run a little faster as it is a slightly stripped down version of Windows 7.
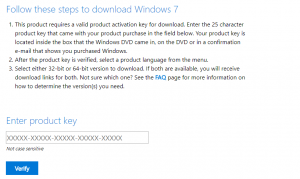
Once you have finished downloading a copy of Windows 7 or followed the alternative method you will end up with a .iso file in your downloads folder or else where, rename this file to “7pe_x86_E” without the quotes. Upon renaming move the iso file you downloaded or created into the SDL folder extracted earlier.
Inside this folder you will have a file named “bochesrc.txt” which contains the default configuration for the boche app. To edit the amount of RAM dedicated to the app open the file and adjust the following line in a text editor of your choice.
Change the 512 to whatever amount of ram you would prefer, for my LG G4 with 3GB of ram I decided to allocate approximately 750 of ram remember it is calculated in MB so make the appropriate conversions depending on your device.
NOTE: AFTER TESTING THIS MYSELF SETTING THE RAM OVER 700-800 MB CAUSED BOCHES TO CRASH, DO TRY A HIGHER NUMBER ON YOUR DEVICE IF YOU CAN BUT IF IT CRASHES THEN PLEASE REVERT TO 700MB OR 800MB TO WORK.
Copying everything to your phone/tablet
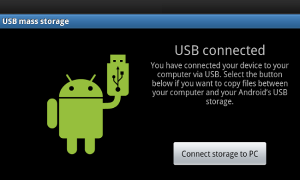
Next plug in your Android phone/tablet to your computer via micro usb cable (Windows users will require a driver which should auto-install or require downloading from the OEM’s website)
Now locate your internal storage and copy the SDL folder to the root of your internal storage (not in any folders)
NOTE: IT IS IMPORTANT TO USE INTERNAL STORAGE NOT EXTERNAL OR ELSE IT WON’T WORK
Once copied safely remove your phone or tablet from your PC and proceed with the next steps to run windows 7 on android.
You may also like: How to install kali linux on android
On your phone/tablet
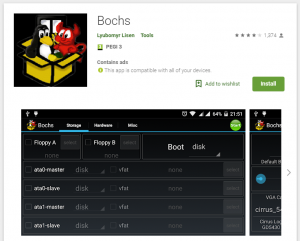
Head over to the Google Play and search for Bochs. Click the Install button to install the app. Bochs is a powerful open source PC emulator that runs on most popular platforms and can emulate most recent x86-64 Intel and AMD processors. The great thing about Bochs is that it runs without root permissions, allowing you to run Windows XP, 7, 8, and 10 without too much hassle.
Also check out: How to run Windows XP on Android
Launch Bochs and if all goes well Windows 7 should begin to boot. At this point, you may also want to go to the Hardware tab and check whether you like the default options. If not, you can change them as you see fit. By far the most important option is CPU Model, but you should also pay attention to Chipset and Memory.
Once you’re ready to boot into Windows 7, tap the Start button in the top-right corner. A full-screen SDL logo should appear, followed by the Windows 7 boot screen. Windows 7 is designed for x86 CPUs, Bochs has to emulate the x86 architecture, which is a very hardware-demanding process. Don’t be surprised if it takes more than an hour for the boot process to finish.
Conclusion
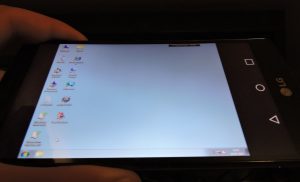
The reward for your patience will be a functioning version of the Windows 7 operating system running directly on your Android device.
While not very practical, this proof of concept serves as an excellent demonstration of how far Android smartphones and tablets have come since the first Android device, the HTC Dream, which was released in 2008. We can only guess how long it will take before it becomes possible to run various Windows applications and games on Android and the future possibilities of this great operating system.
Be sure to follow our social profiles to keep up-to-date and share our content if you enjoyed it. Also be sure to watch our other videos and check out our business services such as SEO, Website Design and more.
Last updated on 15th of December 2022
Other content from our blog:
How to download .apk files from the Google Playstore
Best LMS platforms for small businesses & startups
How to open .dlc files on your computer
Some of the best Crypto platforms for Australians

Alessio Rigoli is the founder of AGR Technology and got his start working in the IT space originally in Education and then in the private sector helping businesses in various industries. Alessio maintains the blog and is interested in a number of different topics emerging and current such as Digital marketing, Software development, Cryptocurrency/Blockchain, Cyber security, Linux and more.
Alessio Rigoli, AGR Technology
![logo-new-23[1] logo-new-23[1]](https://cdn-ihdfn.nitrocdn.com/eZVJvoSTyVixkEUySRKiaseNtUlmgCyu/assets/images/optimized/rev-b7ced37/agrtech.com.au/wp-content/uploads/elementor/thumbs/logo-new-231-qad2sqbr9f0wlvza81xod18hkirbk9apc0elfhpco4.png)
But if we want to remove windows 7 from android and relounch android in smartphone, how can i do it ?
Hi Mohit, you can do this simply by closing out of the app completely and you will be back in Android right away.
Good day! Do you use Twitter? I’d like to follow you if that would be ok. I’m absolutely enjoying your blog and look forward to new updates.|
yeah sure thanks for the support, you can find my Twitter on the bottom of the page.
I am regular visitor, how are you everybody? This article posted at this web page is genuinely good.|