Introduction
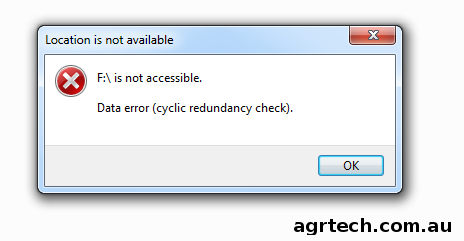
Have you ever encountered the CRC or cyclic redundancy check error on your Windows computer? if so then this guide will help you overcome the issue and get your computer working once more. The cyclic redundancy check is a method of data verification that is used by your computer for checking the data stored in your hard drive or SSD.
The CRC error can be caused by a number of issues like the incorrectly configured files, installation of unsuccessful program, a disordered hard disk or registry corruptions. No matter what the reason of cyclic redundancy check error is, it is quite serious and you need to fix it as soon as possible otherwise, it has the potential to cause data loss or the failure of the total system. Luckily, there are some simple ways by which you can solve this problem.
If you are wondering how to fix cyclic redundancy check error, then this is a simple guide which will help you to solve the problems in a very short time. The name of the utility inside of Windows which we will use is check disk also abbreviated as “CHKDSK“.
Fixing the data cyclic redundancy check error
With that been said follow along with the steps below to begin scanning the affected drive and rid your system of the cyclic redundancy check error.
Step 1:
The simplest way of solving the data error cyclic redundancy check error is to scan the affected drive with check disk inside Windows. This process will scan the drive for errors and allow Windows to correct any issues which may be present on the drive.
Windows has the capability to detect and repair the errors that are causing the cyclic redundancy check error. All you need to do is right click on the drive that you need to check for error then, click on Properties—Tools and under the error checking, click, check now.
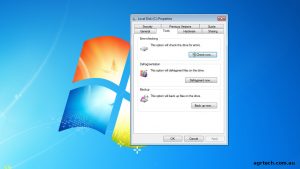
Step 2:
After opening the check disk utility, you can tick both boxes to scan for and attempt to fix bad sectors as well as fix any file system errors which may be present, once both are selected go ahead and click on start to begin the process.
Usually, the process of checking for the data error cyclic redundancy check should take no more than 15 to 20 minutes however may take up to a few hours depending on the size of the disk and amount of files on the drive been scanned so you may need to wait a while depending on your specific circumstances.
Step 3:
Once done you should receive a dialog box to say the process has been completed, if you are scanning the main C drive which Windows resides on then you will receive a dialog like this which gives you an option to schedule a disk check.
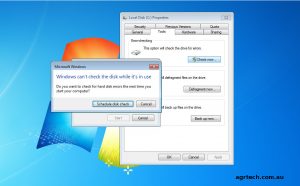
Choose it and restart your computer for the scan to commence, this process cannot be done inside of Windows so a restart is necessary for check disk to properly analyse the drive and attempt any fixes.
Step 4 (alternative):
Another way in which you can scan the drive is through command prompt, in order to this you will need to be logged in as an Administrator. From here go to the start menu and type and “cmd” and right click it and select “Run as Administrator” to open command prompt.
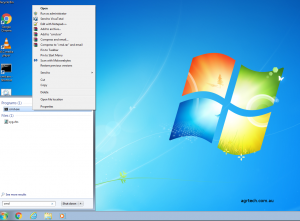
Once a command window opens type the following command replacing the drive letter with the affected drive, in this example we will use the drive letter C. Once your done press enter on your keyboard to start the scan and wait until its done before restarting your computer.
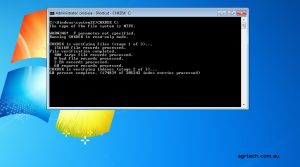
CHKDSK C:\
Conclusion
Once the whole process of disk scanning is complete, restart your computer and everything should be working fine once more.
Has this guide helped you out? if so be sure to share it with your friends and check out the software tools and videos for more content.
Other posts you may like:
How to easily remove adware from your PC
Kon boot tool to remove windows password
Last updated on 31st January 2020

Alessio Rigoli is the founder of AGR Technology and got his start working in the IT space originally in Education and then in the private sector helping businesses in various industries. Alessio maintains the blog and is interested in a number of different topics emerging and current such as Digital marketing, Software development, Cryptocurrency/Blockchain, Cyber security, Linux and more.
Alessio Rigoli, AGR Technology
![logo-new-23[1] logo-new-23[1]](https://cdn-ihdfn.nitrocdn.com/eZVJvoSTyVixkEUySRKiaseNtUlmgCyu/assets/images/optimized/rev-e93b6b3/agrtech.com.au/wp-content/uploads/elementor/thumbs/logo-new-231-qad2sqbr9f0wlvza81xod18hkirbk9apc0elfhpco4.png)
