3 Ways To Stop Forced Updates In Windows 10
Since 2015, the Windows 10 operating system has been frustrating its users with what is now considered to be one of its most controversial features: forced updates. While useful in theory, forced updates have been causing Windows 10 users to lose work, and they may take over an hour to install, making the computer unusable for the whole time.
Fortunately, there are several ways to stop forced updates in Windows 10, and, in this article, we describe three of them. But before we proceed, you should know that automatic updates are typically a good thing as they protect against malware and other cybersecurity threats. To stay secure, don’t leave automatic updates disabled for longer than necessary.
Method 1: Windows update settings
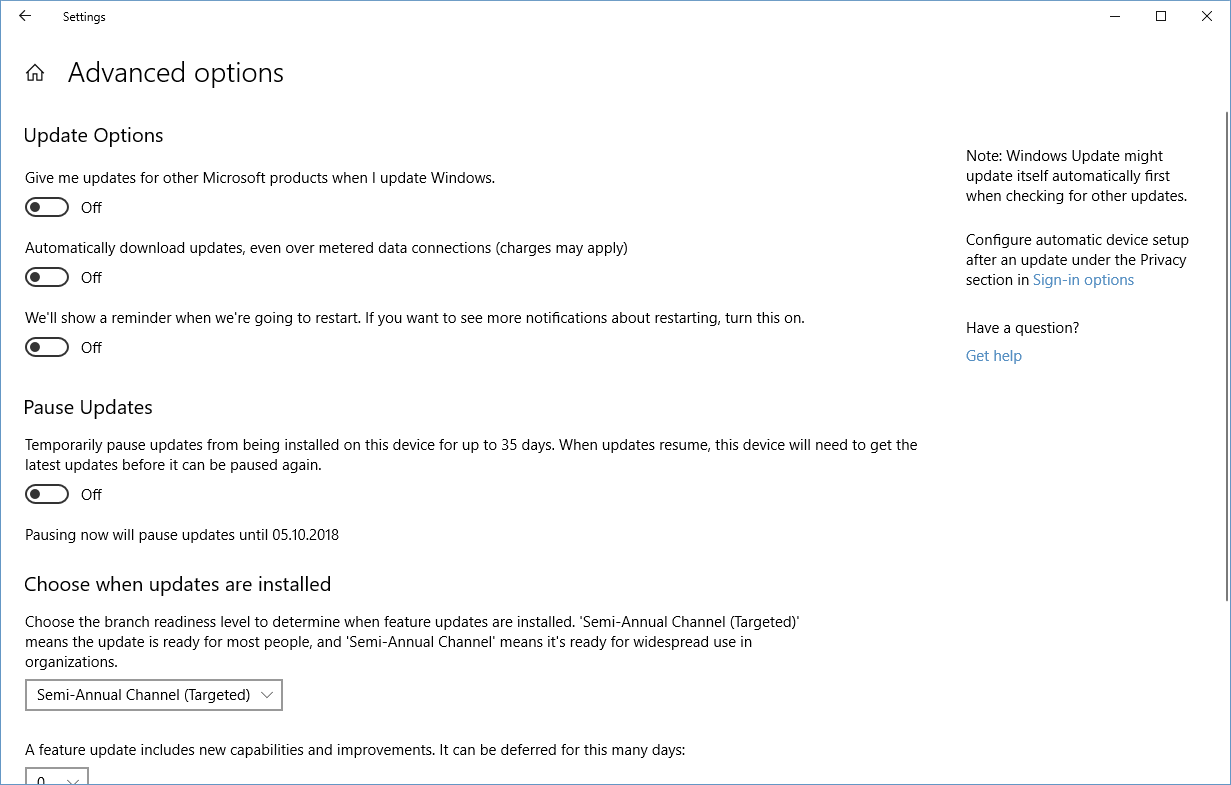
Recent versions of Windows 10 give you the option to temporarily pause updates from being installed on your device for up to 35 days. To access this option, go to Settings → Update & Security → Advanced Options.

There, you should see the “Pause Updates” option with a toggle switch. Click on the switch to disable updates for 35 days. You can, of course, enable automatic updates manually at any time, and we advise you to do so as soon as possible for security reasons.
Method 2: Disable the Windows update service
Updates in Windows 10 are just another process that you can disable manually with these simple steps:
-
Open the Start menu.
-
Type “run” and hit enter.
-
Type “services.msc” and hit enter.
-
Scroll down until you see a service called “Windows Update.” You can click on the service to see its description.
-
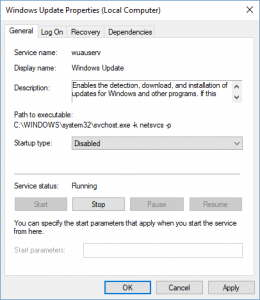
Double-click on the service. A new window should appear.
-
Look for an option called “Startup type.”
-
Change it to Disable.

To enable the Windows Update service again, all you need to do is repeat the steps and change the Startup type option to Automatic. You may also change it to Automatic (Delayed Start) to improve your boot time slightly.
Method 3: Set up a metered connection
Believe it or not, there are still many people on a metered connection. Without unlimited data, every megabyte has to count, which is why Windows 10 installs only high-priority updates when users set up a metered connection.
To get started follow the steps below:
-
Open the Settings app.
-
Go to Network & Internet’.
-
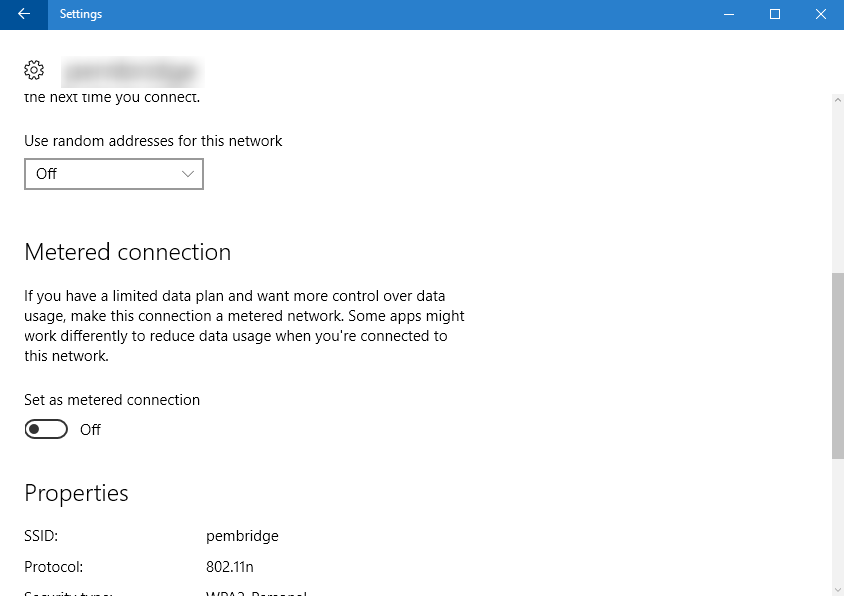
Click on “Wi-Fi” and go to “Advanced options.”
-
Toggle the “Set as metered connection” option to “On.”

Keep in mind that you can set up a metered connection only when connected over Wi-Fi, so it won’t be available if your PC uses an Ethernet cable to connect to the internet.
Conclusion
In this article, we’ve explained three different ways how to stop forced updates in Windows 10. Despite this annoying feature in Windows 10 we hope to have made it less frustrating by showing you some quick workarounds.
Remember that automatic updates are an essential security feature, which is why you should never keep them disabled for longer than what’s absolutely necessary.
Related posts:
How to remove adware from your PC
How to fix “this copy of windows is not genuine error”

Alessio Rigoli is the founder of AGR Technology and got his start working in the IT space originally in Education and then in the private sector helping businesses in various industries. Alessio maintains the blog and is interested in a number of different topics emerging and current such as Digital marketing, Software development, Cryptocurrency/Blockchain, Cyber security, Linux and more.
Alessio Rigoli, AGR Technology
![logo-new-23[1] logo-new-23[1]](https://agrtech.com.au/wp-content/uploads/elementor/thumbs/logo-new-231-qad2sqbr9f0wlvza81xod18hkirbk9apc0elfhpco4.png)
